
Multiplayer 3 Notes
Table of Contents
- Section 1: Introduction
- Section 2: Software Requirements
- Section 3: Launching the Game
- Section 4: Troubleshooting
- Section 5: Reporting a Match
- Section 6: Battlestats
- Section 7: Rules and Etiquette
- Section 8: Awards
- Section 9: Basic Tactics
Section 3: Launching the Game
Starting the Game
This section describes how to start a game as a host or as a joiner.
Game Ranger
Launch Game Ranger. You will be taken to a server browser. Game rooms are labeled by game type.

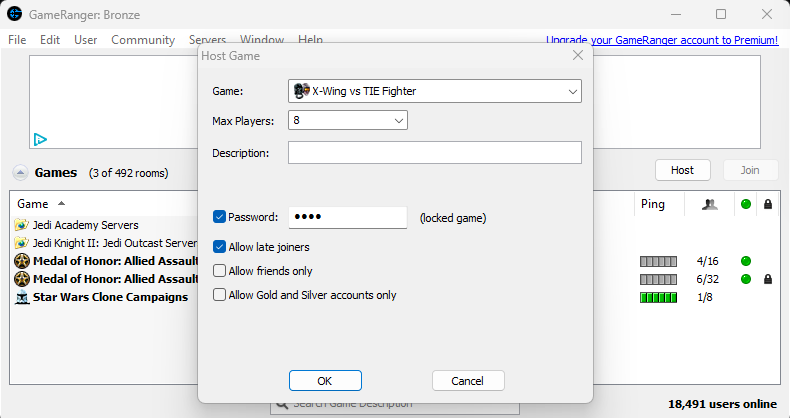
If you are joining someone, you can navigate to their room. If you are hosting, click File in the upper left corner and then “Host Game...” You will be prompted to identify the game you wish to host, the maximum number of players allowed, and some security settings such as a password.
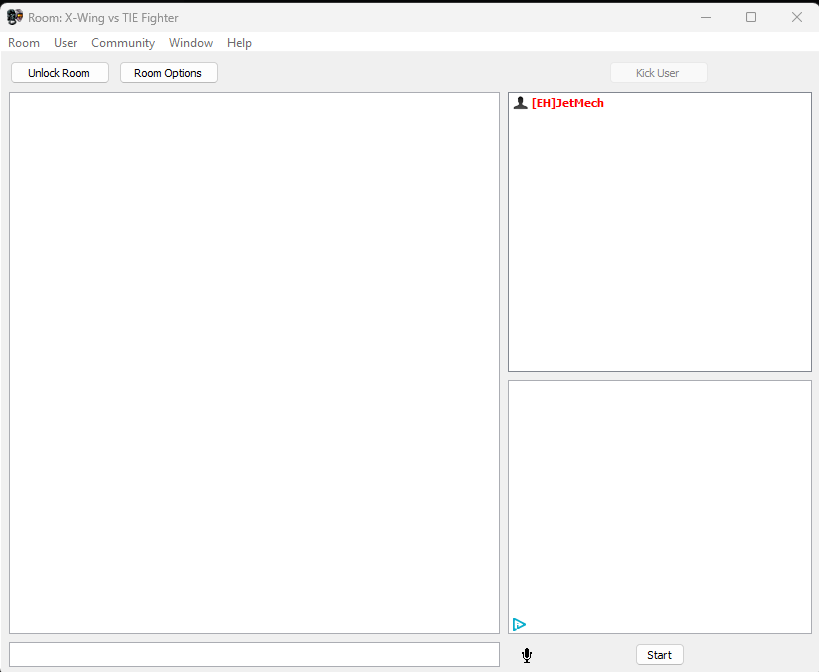
Once all participants are in the room, the host will then launch the game of choice via the “Start” button in the bottom left of the room window. Game Ranger will launch the game for all players and automatically connect them to the multiplayer hub of the game.
At this point there are a few differences depending on the game.
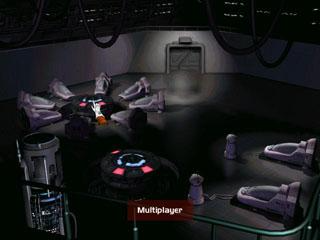
X-Wing Alliance
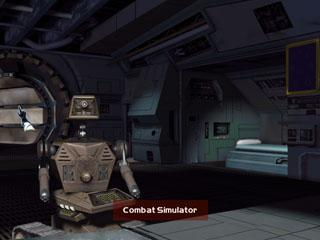
If you are playing XWA, start the game, enter the Combat Simulator, and select Multiplayer. The exact locations of these options depend on whether you have moved up to the cruiser concourse, or are still in your family transport. The following screens show how to reach the multiplayer area in both cases.
NOTE: The following instructions for setup will only be applicable if you are not using GameRanger. GameRanger will streamline a lot of these steps.
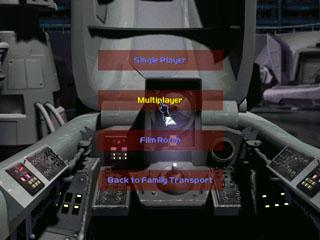

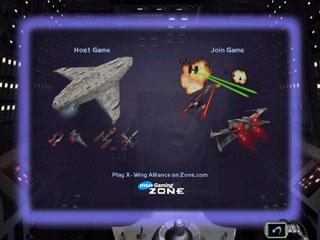
You will now be presented with the option to host or join the game. Choose the appropriate one.
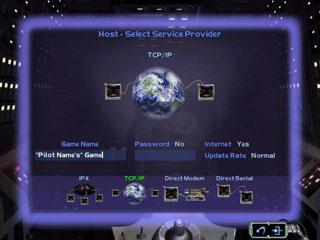
If you are the host, select TCP/IP from the options at the bottom, ensure “Internet” is “Yes”, and “Host/Update Rate” is “Normal”. Then proceed on to the next screen and wait for players to join.
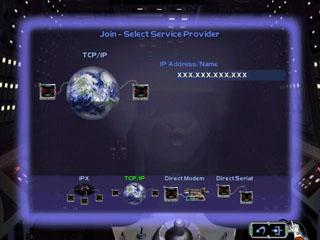
If you are joining, select TCP/IP from the options at the bottom, and enter the IP of the host. Proceed, and the game will attempt to connect to the host.
Next is the skirmish setup screen. The host sets up the game and drags players into their appropriate flight groups.
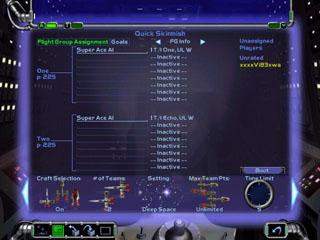
To set up a traditional 1v1 or 2v2 game, the host first creates a skirmish type game (not a combat engagement). Then, the host creates flight groups on each team, selecting the appropriate craft and armament. The only important thing to remember with this is to give each flight group “Super Ace AI”, as this affects the number of points given for each kill, which is in turn important for some competitions (like Week of War).
There are also several options at the bottom, which you can scroll through with the arrows at left and right. Particularly important is the time limit, which should be 10 minutes. Also ensure that collision damage is on and the start distance is 3 km.
X-Wing vs. TIE Fighter & Balance of Power
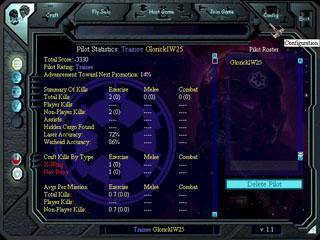
If you are playing XvT or BoP, the first step is to start the game and select your pilot file, shown on the screen below.
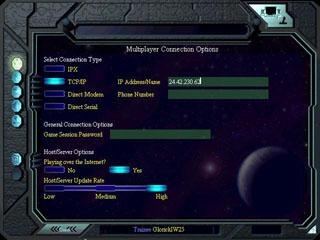
Next, check your multiplayer connection settings by clicking on the Config tab. Ensure that the connection type is “TCP/IP”, “Playing over the Internet” is set to “Yes”, and the “Host/Server Update Rate” is set to “High”. Finally, if you are joining the game, enter the host’s IP address into the “IP Address/Name” box. To exit, click “Done” at bottom. These options are shown below. These settings(apart from the IP address) will be necessary whether you are using GameRanger or not.
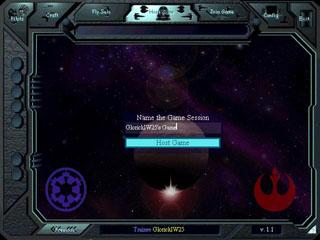
The next step depends on whether you are hosting or joining. If you are hosting, select the “Host a Game” option at the top. This will give you the following screen, where you give the game a name. The name doesn’t really matter; it is just displayed at the top of the screen when the game is created, so call it whatever you want (subject to the EH Code of Conduct, of course) and continue.
If you are joining a game manually rather than using GameRanger, then choose the “Join a Game” option at the top. The game will then attempt to connect to the host, displaying the following screen. If all goes well, you will be connected to the host within 30 seconds ±.

The next screen is the mission selection screen. This also lists the players connected to the game, and has a chat box to chat with them. At this point, the host selects the mission to play. For 1v1 play the most common is Basic Furball, under the Melee category. For 2v2 play, it is Furball for Two-Man Teams. There are also 4v4 games and so on (very unusual though) and in order to play those and FFAs (1v1v1) you'll need a patch located HERE or HERE at Cyclone Squadron website. Then, if you want to play an FFA you must select a special scenario named FFA for Three Players, located under "Custom Melees" (it was specifically designed to balance the starting positions for competitive play). For the rest of the curious setups (4v4, 5v5...) you must use 10 Melees in One, also under "Custom Melees". Other missions like combat engagements are only used if the competition specifically specifies them.
The host also has the duty of setting up the options for the game. The mission time limit should be 10 minutes. The difficulty must be “Hard”, as this affects the points given for each kill. Randomize must be off. Craft selection should be set to “Host Only” if all players will use the same craft, otherwise it should be “On”. The other options can be left at their default values.
If you have joined the game, you can still view the options to make sure that the host has set them correctly, and point out any problems.
The next screen is shown if the game is a team game (like a 2v2), and allows the host to choose the teams. If you are the host, drag the players so that they are on the proper teams. Joiners can relax and let the host pull them around.
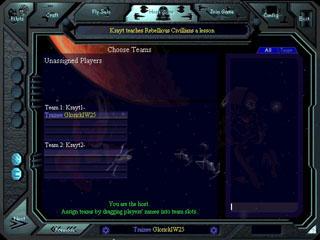
In team games, the next screen allows the team leader (person at the top of the team list) to assign flight groups. For melee missions, this doesn’t matter, so just proceed to the next screen if you are the team leader.
This brings you to the last screen before the actual game, namely the craft selection screen. If the host has set craft selection to “Host Only”, then the host selects the craft for everyone. Otherwise, everyone has access to craft selection, so select the craft agreed upon with your opponents. Note that in normal play, warheads, beam weapons, or countermeasures are not used, so don’t pick these unless you’ve agreed upon them.
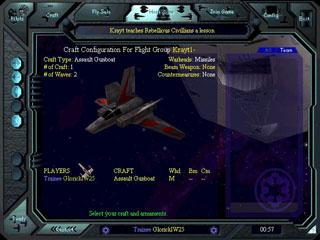
If craft selection is “Host Only”, the host launches the game. Otherwise, the game launches when all players click “Ready”.
Empire at War
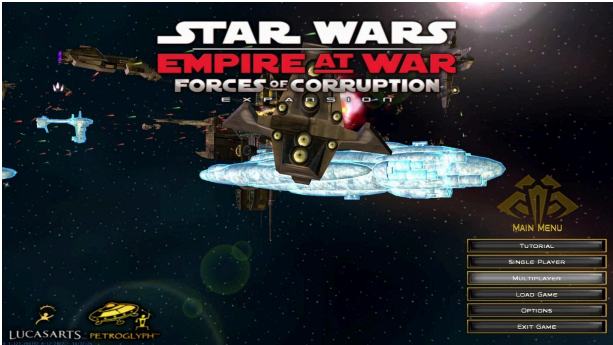
If you are playing Empire at War, you’ll need to select the Forces of Corruption expansion when you boot the game. This is the only form of the game currently allowed by the Combat Operations Office to be eligible for Legions of Combat or Skirmish.
NOTE:
- The Thrawn’s Revenge mod is currently an acceptable configuration as well.
- The Steam version of Empire at War has reintroduced online matchmaking and makes it incredibly easy to connect with others. The Steam and GOG version of the game will not talk to each other. GOG will require the use of GameRanger, much the same way one would if attempting to play X-Wing Alliance or X-Wing vs. TIE Fighter.
When you first load in there will be a number of options on the right hand side of the screen. Select Multiplayer from this list and then Internet. This will bring you to the menu below.
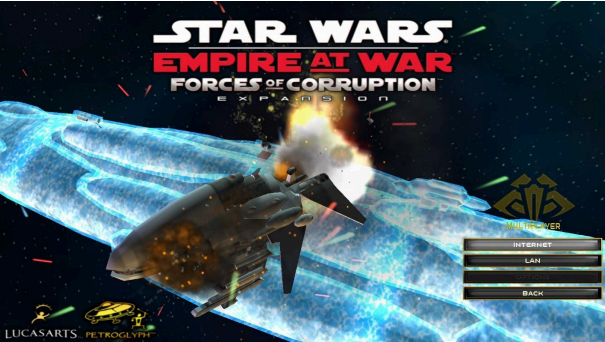
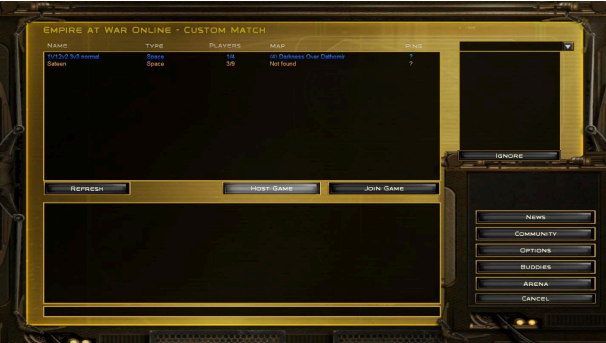
From this menu, you may click on Host Game to bring up the options for making your own lobby.
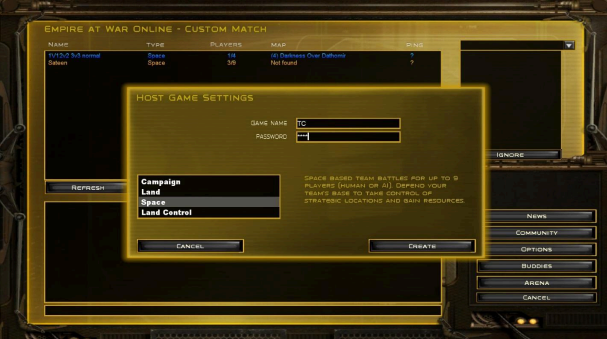
From this point you may select what kind of game you’d like to play. At this time Land and Space are the only options eligible for Legions. You may set your lobby name and password here as well. Make sure you select something that your friends will be able to easily find and set a password that’s easy to communicate. A common password is “ehtc”, for the sake of simplicity.
Once you’ve got that taken care of you need to set the options for the match itself. In order for it to be eligible for a Legion of Skirmish it must meet the following criteria:
- No Heroes
- Allow Starting Units
- No Superweapons
- 2000 Starting Credits.
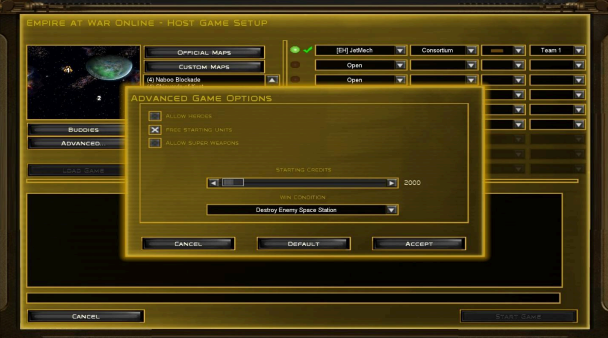
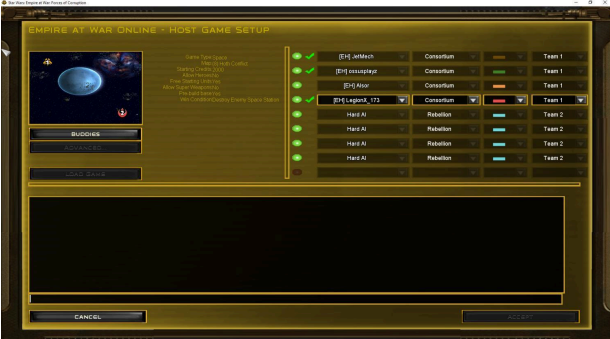
You must also have the same number of AI opponents as human players if the AI is set to Medium, or one fewer AI if set to Hard. Screenshots are required to show this setup for it to be eligible for a Legion. The total time of the match must be at least 5 minutes.
NOTE:
- In the Thrawn’s Revenge mod, the AI may be set to easy if the teams are equal, but only in the Thrawn’s Revenge mod. This is due to the substantial overhaul that the AI received in this mod.
- The screenshot of the setup must be taken by someone other than the host. It will look like this:
NOTE: Note: For a Legion of Combat in Empire at War, the only change to these options is that superweapons are allowed.
Ok, so you’ve won your match! You’ll need a second screenshot, this time showing your victory results.
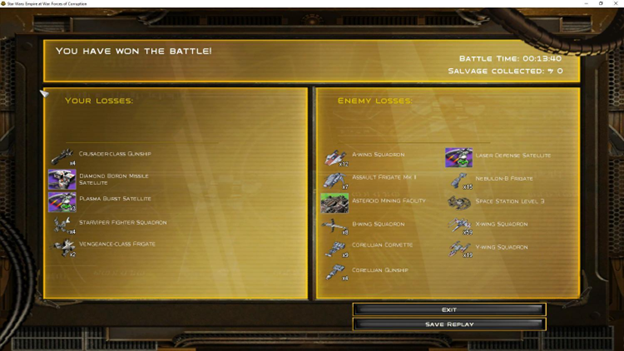
Let the game begin!